PCB for MiniBox
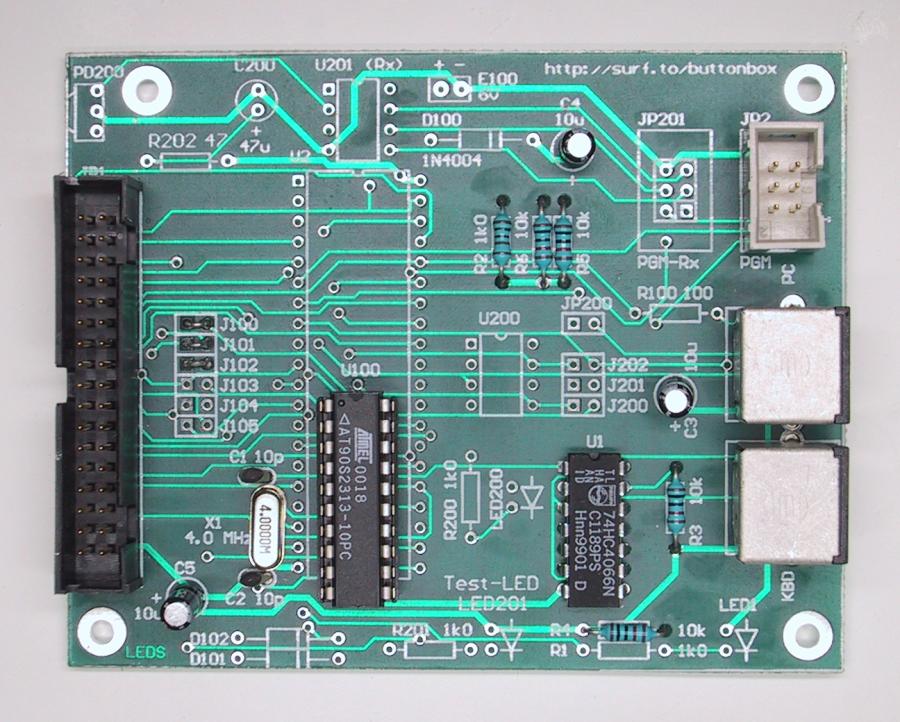
When you use the PCB to build a MiniBox, it will look like this when it's ready:
|
|
As you can see, there is a lot of empty space on the card :-). |
These are the things you have to mount on the PCB to get a working MiniBox:
| Part number | Item |
|---|---|
| U1 | 74HC4066, Quad bilateral switch |
| U100 | Atmel AT90S2313 CPU |
| X1 | 4.0 MHz crystal |
| JP1, JP2 | IDC connectors |
| PC, KBD | 6-pin mini-DIN connectors (female) |
| C1, C2, C3, C4, C5 | Capacitors |
| R2, R3, R4, R5, R6 | Resistors |
| J100, J101, J102 | Jumpers |